Color correction effects are designed to enhance the visual quality of layers by adjusting their colors. Color correction is intended for the initial color manipulation and for fixing problems.
Also see Color grading.
Auto color, contrast & levels
These effects automatically adjust the layer's color, contrast or levels.
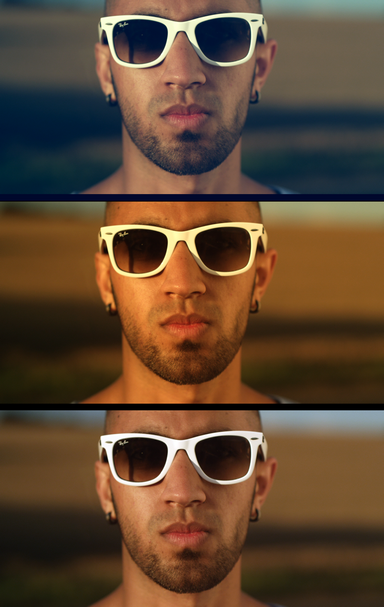
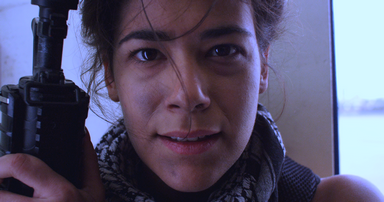
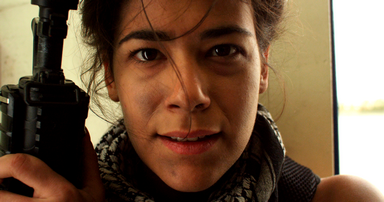
The image below shows the different results of auto color, auto contrast and auto levels from top to bottom:
By default the auto grading effects update on each frame, which can cause fluctuations in the layer's appearance as the contents of the frame change.
By activating the Select frame property you can manually choose a frame to use as the source for the automatic adjustment, which will be used for the duration of the layer.
Brightness & contrast
Quick adjustment of the layer's brightness and contrast.

Color balance
Individually adjust the balance of red, green and blue in the layer's shadows, midtones and highlights.
The Preserve luminosity property retains the layer's original brightness when altering the colors.
Color correction wheels
This effect provides a visual way to quickly adjust the highlights, midtones and shadows of your layer.
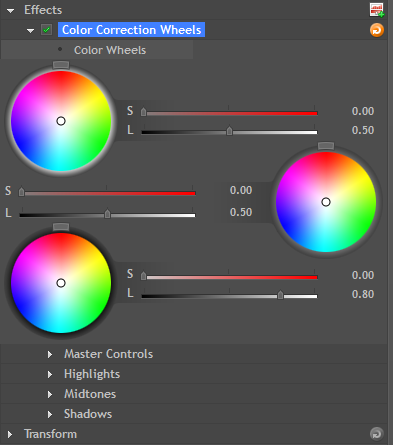
You can drag on the color wheels to adjust the color balance of highlights (top wheel), midtones (middle wheel) and shadows (bottom wheel). The further out from the center of the color wheel you drag the point, the more saturated the colors will become.
The sliders can be used to adjust the strength and lightness of the adjustment, and the rotator on the wheels changes the hue.
Additional controls can be found in the property groups below the wheels, including a white balance property which functions the same as the separate white balance effect.
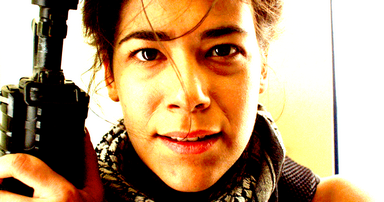
Here you can see the difference the color wheels effect can make to a layer, with the original shown first and the color corrected version below it:
Color temperature
Use to warm or cool your layer.
Crush blacks & whites
An alternative to simply altering the contrast, this enables you to change the black and white points separately for finer control.
Exposure
Requires HitFilm 2 Ultimate.
Simulates the effect of letting more light into the camera lens.
Gamma
Individually alter the gamma of red, green and blue channels.
Hotspots
Requires HitFilm 2 Ultimate.
A quick and easy way to isolate the bright areas of your layer.
Hue, saturation & lightness
Control over the hue, saturation and lightness of each color channel.
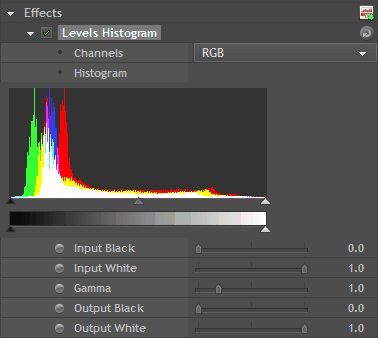
Levels histogram
Requires HitFilm 2 Ultimate.
Levels gives you detailed information about the channel composition of the layer. The graph tabs or the sliders can be used to constrain the layer. The histogram is a more accurate way to assess colors than by eye.
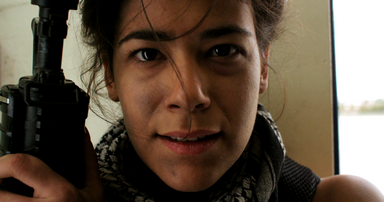
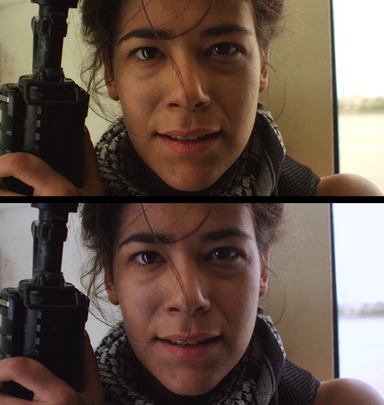
White balance
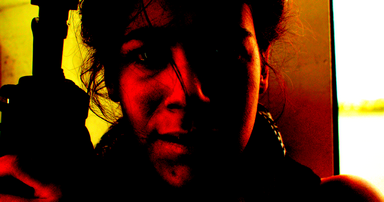
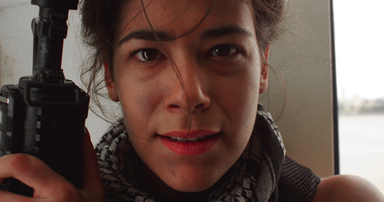
If your video was shot with incorrect white balance, this effect can help to correct the problem. Use the color pipette to select a part of the video that should be white and the layer will be corrected.
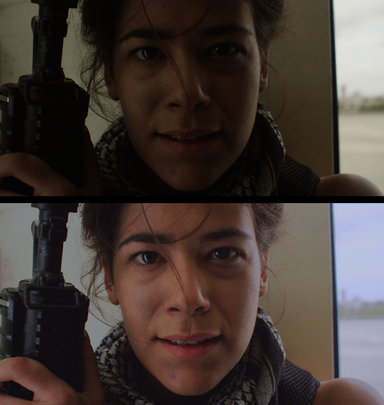
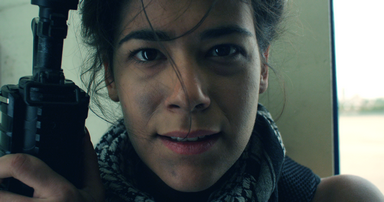
In the example below, the white balance has been set to the wall behind the actress. The top image is the original, with an overly warm, yellowish appearance, while the bottom image shows the corrected white balance.