A selection of filters are available to enhance your images. These can be vital for blending the foreground and background together realistically, or for creating a vivid style.
The order in which filters are processed can be changed using the up and down arrows that are attached to each one. Filters at the top are processed first.
By default all filters are turned off. To turn a filter on click anywhere in its title bar.
Changing layer
The filters affect the foreground and background individually. You can switch between the foreground and background using the tabs at the top of the toolbox.
Not all filters are available in both the foreground and background layers.
Filter list
Transparency
Alters the transparency of the foreground.
Auto levels, contrast & color
These automated filters apply quick color correction fixes to your images.
Brightness
Alters the brightness, from completely black to completely white.
Contrast
Can be used to create extremely low contrast or high contrast images.
Saturation
Alters the saturation, from fully de-saturated to over-saturated.
Levels
These sliders can be used to adjust the black and white levels of the image.
The closer together the white and black levels, the higher the contrast.
Color temperature
Alters the color temperature. A low temperature shifts the image towards orange, while a high color temperature shifts it towards blue.
Color balance
Individually adjusts the amount of red, green and blue.
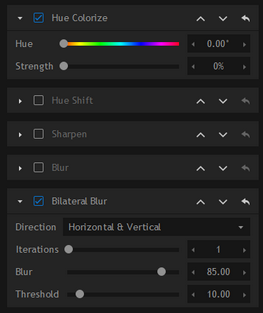
Hue colorize
Enables you to add a tint to the image by altering the hue.
Hue
This slider determines which color to use as the tint.
Strength
Alters the strength of the colorize, from subtle to extreme.
Hue shift
Shifts the entire color spectrum.
Hue
Use the slider to determine the hue shift. The top half of the slider represents the original colors of the image, while the bottom half represents the shifted colors.
Strength
Adjust the intensity of the hue shift.
Sharpen
Can be used to sharpen the edges in an image.
Radius
Adjust the reference area for the sharpen filter.
Sharpness
Adjusts the intensity of the sharpen effect.
Blur
Applies a gaussian blur. This can be particularly effective when applied to the background of portraits.
Bilateral blur
The bilateral blur is effective for smoothing out skin and clothing textures, by blurring the image while retaining edge sharpness. At high levels it can also create a cartoonish appearance.
Direction
Alters the direction of the blur.
Iterations
Increasing the iterations substantially exaggerates the effect.
Blur
Adjusts the amount of blur.
Threshold
Determines how much edge detail is retained.
Defocus
This is a special type of blur that also blooms the image, making it brighter. This can sometimes create a more realistic 'out of focus' effect than the standard blur.
Blur
Alters the level of blur.
Bloom
Exaggerates brighter areas.
Diffuse
Creates a soft, smoothed appearance.
Blur
Adjusts the size of the blur. Larger blurs will create a more dispersed effect, while smaller blurs will create more of a 'ghost' image.
Strength
Alters the intensity of the diffusion.
Vibrance
Creates a more dynamic image by increasing local saturation, contrast and sharpness.
Recommended settings are to use a high radius and a medium threshold.
Leave color
Using similar technology to green screen removal, Leave color removes all color from an image except for the selected color. This creates stylish splashes of color on black and white images.
The isolated color can be selected using the pipette tool or by clicking in the color box.
Half tone & half tone color
Converts the image to a series of differently sized dots, simulating the appearance of traditional newspaper print.
The size of the dots can be adjusted using the resolution setting.
Silhouette
This effect turns your entire foreground layer to a uniform color.
You can change the color by clicking on the color box. To turn silhouette on and off use the checkbox to the right of the filter's name.
Shadow cast
A convincing shadow can make all the difference when it comes to creating realistic composites. The shadow cast effect provides a quick way to add a shadow from your foreground onto the background.
Shape
The shape menu contains four preset shapes for the shadow, providing useful shortcuts for common uses.
Canvas controls
When you switch on the shadow cast new controls will appear on the canvas. These can be used to manually position and warp the shadow according to the lighting and angle of the background.
Blur
Use this to change the shadow from hard edged to soft edged, based on the requirements of the scene.
Transparency
Alters the visibility of the shadow. Note that the blend mode also has a large impact on the shadow's appearance.
Color
Clicking this button displays a color palette from which you can pick the shadow's color. The default black suits most purposes.
Blend mode
The seven different blend modes mix the shadow with the background in different ways.
Depth of field
If you want to draw the eye towards your foreground, simulating depth of field can be a very useful technique. Rather than blur the entire background image, this effect applies the blur gradually, shifting from in-focus to out-of-focus.
Type
The depth of field focal area can have a horizontal or radial dividing line.
Origin
The depth of field only affects a specified area of the canvas. Click the origin button to display a crosshairs on the canvas which you can use to pinpoint the area that will remain in focus. You can also enter coordinates directly using the number boxes.
Angle
The in focus area is a rectangle that spans the full width of the canvas. The angle of this rectangle can be adjusted using this rotation wheel.
Blur
Adjusts the level of blur in the out of focus area.
Spread
The shift from in focus to out of focus can be abrupt or very gradual. A higher spread percentage will result in a more gradual shift.
Range
Adjusts the size of the in focus area. A larger percentage will retain a large in focus area.
Transparency
Can be used to adjust the intensity of the depth of field effect.