PhotoKey 8 Pro can send images by email from inside the software. This can be a very fast way to send proofs to clients. The system can also be used to publish images to Facebook, Flickr and other social networks which support a custom email address for submissions.
Some email providers do not support this feature.
Setup & preferences
Before you use the email feature you need to set up your preferences.
To open the email preferences window select Options from the File menu, then switch to the Email tab.
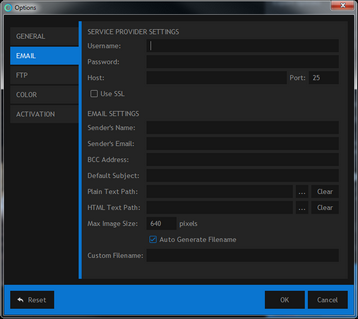
Service provider settings
PhotoKey requires access to an email SMTP provider for sending emails. Please check with your email provider for login and host details. Note that TLS is not supported.
| • | Username: the username you use for logging in to your email account. |
| • | Password: the password you use for logging in to your email account. PhotoKey stores this password in a secure, encrypted form. |
| • | Host: the address of your SMTP server. For example, a Google email address uses ‘smtp.gmail.com’ as its host. |
| • | Port: the port for your SMTP server. For example, a Google email address uses ‘465’ for its port. |
| • | Use SSL: some email servers require SSL to be activated for security. |
Email settings
The email settings are applied to every email that is sent from PhotoKey.
| • | Sender’s name: the displayed sender’s name. The recipient will see this in their email inbox. |
| • | Sender’s email: the displayed sender’s email. If the recipient replies to the email their reply will be sent to this email address. Note that some email providers do not support sending emails with alternate email addresses. |
| • | BCC address: emails can be sent via blind carbon copy to one additional email address. This is optional. This can be used to easily publish images to a Facebook brand page (see below). Note that if this field is filled in, all emails sent from PhotoKey will be sent to this email address. |
| • | Default subject: this will automatically define the subject line when sending an email. If you always use the same subject this is more efficient than typing it in each time. |
| • | Plain text path: a text (.txt) file can be specified. Its contents will be used as the body of the email. Click the … button to select a text file. The Clear button removes the link to the file. Emails can be sent without a text file included. |
| • | HTML text path: an HTML (.htm or .html) file can be specified. Its contents will be used as the body of the email. Click the … button to select an HTML file. The Clear button removes the link to the file. Emails can be sent without an HTML file included. Note that images cannot be embedded in the HTML email and must be linked to externally. |
| • | Max image size: PhotoKey automatically resizes the canvas. This setting determines the pixel dimensions of the image, with the setting specifying the size of the image’s longest edge. Note that larger image sizes will create larger file sizes and that some email providers do not accept large attachments. |
Emailing an image
To email your current image from inside PhotoKey, choose Email canvas from the File menu.
You can also click the email icon on the toolbar (a white envelope) or use the Ctrl+M keyboard shortcut.
This will display the email window.
Send email settings
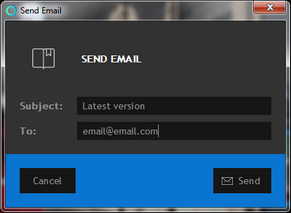
| • | Subject: A subject must be specified before the email is sent. This can be pre-filled using the Default subject setting in Options (see above). The subject will be used as the caption for Facebook and Flickr published images. |
| • | To: One or more email addresses can be added to the To: field. If multiple email addresses are used they should be separated by spaces or semi-colons (;). |
Note that separating email addresses with commas (,) is not supported.
Email format details
Images are sent as email attachments. The images are in the JPEG format. The pixel dimensions (and therefore file size) are set in the preferences (see above).
HTML or text content can also be optionally included in the body of the email. This enables you to include a message with the image including additional information or branding.
BCC and Facebook integration
In addition to the main email recipient, who is specified at the point of sending, images can also be sent automatically by BCC to another email address.
This can be used to automatically add images to a Facebook profile or brand page. To do this you first need to find your Facebook page’s email address:
| 1. | Login to Facebook and go to your brand page. |
| 2. | Choose Edit page to view its details. |
| 3. | Go to the Mobile section. |
| 4. | An email address will be shown on this screen. |
This email address can then be used in PhotoKey to send images directly to your Facebook page’s wall.
Note that Facebook will immediately publish images that are sent to the page’s email address.
This same method can be used to publish to other social networks that provide a custom email address, such as Flickr.
Sending an email
Once you have setup your email provider, you can export an image and send it via email by clicking the email button on the navigation bar or by choosing Email Canvas from the File menu.