This chapter guides you through PhotoKey's essential features.
The toolsets
PhotoKey's features are organized into several toolsets. By default these are all listed on the left of the interface and you can switch between any of them at any time while working on a project.
Selecting a toolset on the left displays it in the toolbox on the right.
The toolsets are listed in workflow order. You won't always use every single one, but you'll often start by setting up your canvas, then switch to the import toolset to bring in your images, then go to the key toolset to fine tune the results - and so on.
Setting up your Canvas
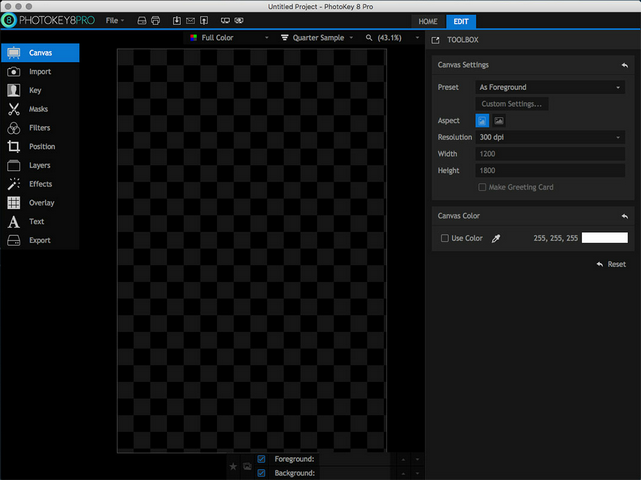
After starting PhotoKey, the first thing you'll notice is that there's a large rectangle in the middle of the workspace that is filled with a checkerboard pattern. This area is your canvas and the pattern represents transparent areas. As you have not yet imported any images, the entire canvas is transparent.
When saving to an image file or printing, the pattern will be not be visible. JPEG images and prints will show transparent areas as white, while PNG and TIF images will retain the transparency.
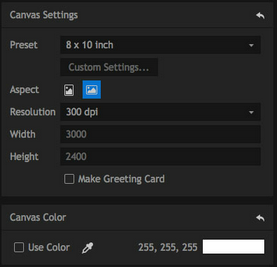
The canvas settings allow you to choose from several common photographic and paper sizes, landscape or portrait layouts and a range of DPI resolutions.
If you're not sure what to use, setting the Preset to As Foreground will create a canvas to match your green screen photograph.
In this example an 8 x 10 inch landscape canvas at 300dpi will suffice.
Check out the Canvas chapter for more details.
Import your images
The next thing to do is bring in some images. This is done using the Import toolset.
You can manage your foreground and background images separately, using the foreground/background tabs at the top of the toolbox.
Images can be imported by clicking the Import button, then locating them on your computer. They will then be listed in the toolbox and you can preview each image by clicking on it:
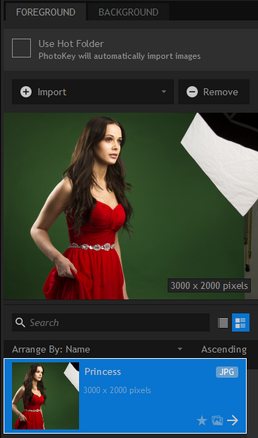
You can import multiple foreground and background images, which is useful for batch processing. In this tutorial we'll just be using a single image.
The image will also be displayed on the Canvas, with the green screen automatically removed.
By switching to the Background tab you can now import an image to place behind the keyed subject. The foreground and background are automatically composited together:
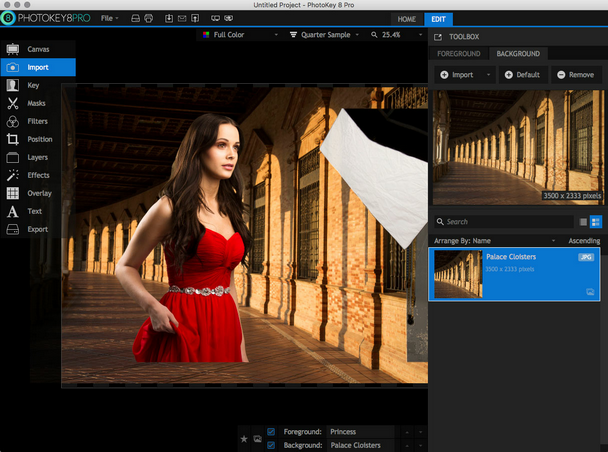
In many cases, this is all you need to do in PhotoKey to get a good result. It's a very fast way to work.
This particular image requires further customization, especially to remove the corner of the green screen which is still visible in the top right of the canvas, which was not automatically removed.
See the Import chapter for more details.
Key out your green screen
The automatic removal of a green screen from an image is called keying. Although PhotoKey's default settings create excellent results you will sometimes want to fine tune the settings.
There are multiple keying tools available but the three you will use most often are chroma key, spill suppression and light wrap. When used together these three create very high quality results.
The chroma key tool is responsible for removing the green screen. The composite will sometimes look good even when there are imperfections, so the View menu is used to create a more analytical display:
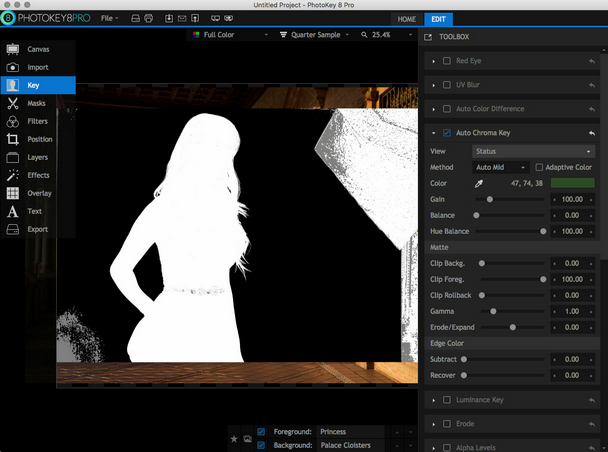
Black areas represent fully transparent areas of the foreground.
White areas represent fully opaque areas of the foreground.
Gray areas represent semi-transparent areas of the foreground.
This makes it much easier to see at a glance where you need to make adjustments. In this case we need to remove the studio area visible on the right, but there are also two patches of green screen that need removing on the left.
Slightly increasing the Gain setting easily removes the patches on the left. The woman's belt has a couple of transparent patches, and clipping the foreground is the easiest way to fix this.

Don't forget to switch the View back to Result.
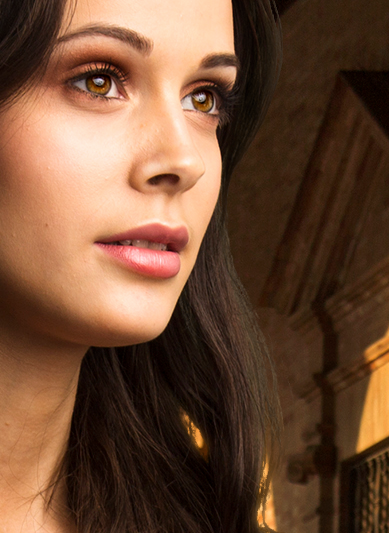
The spill suppression tool is integral to achieving realistic results. This tool is used to remove the unwanted green spill light cast by bounced light from your green screen onto your subject. PhotoKey's spill simulation pro feature automatically replaces the green spill with realistic spill taken from your new background.
Increasing the hue range causes more of the foreground to be affected. In this case increasing the huge range to 30 ensures that the woman's hair color accurately reflects the lighting of the background. The luminance option should also be reduced in this case, to avoid unwanted brightening of the hair's edges.
To compare the results, here is the image without spill suppression:
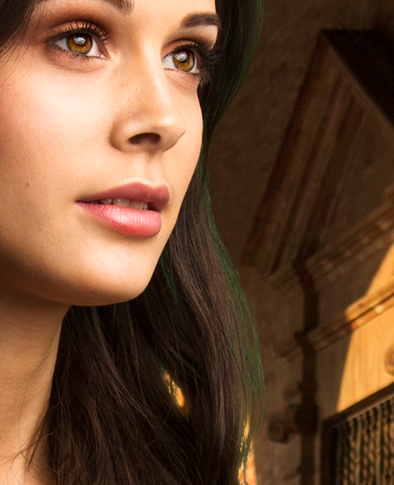
Note the visible green spill on the edges of the hair. And here is the same image with spill replacement pro turned on:
For detailed information on all the Keying tools, take a look at the Key chapter.
It's worth noting that if you have to drastically adjust your Key settings every time, it is worth examining your green screen setup. A little extra time in the photography stage can save a lot of time during compositing.
Draw Masks
You should always aim to have your green screen fill the frame, as it makes the compositing stage simpler. Sometimes however you will need to manually remove unwanted elements, and PhotoKey has built-in tools to make this easy.
The Masks toolset is where you can add custom shapes to remove or retain specific parts of your image. This example only needs a single mask, drawn around the right edge of the frame.
A new mask can be added with the Add mask button. The mask shape is then drawn directly onto the canvas by clicking with your mouse. Clicking back on the first point will close and activate the mask.
![]()
Read the Masks chapter for more details.
Position your layers
The images don't quite fit the chosen canvas. The foreground and background can be separately adjusted using the Position tools.
When making position adjustments you can either use the toolbox sliders or the canvas controls. The canvas is faster and easier, while the toolbox provides more precision.
Switching to the Background tab lets you adjust the background. Clicking and dragging on the blue square on the canvas is a fast way to scale up the background to fit the canvas.
Now switch back to the foreground and adjust the image until you're happy with the composition.

The Position chapter contains full details.
Add creative Filters & effects
PhotoKey 8 Pro includes a wide range of filters and effects that can be used to enhance the appearance of your images.
Filters can be applied separately to the foreground or background, while Effects apply to the finished image.
By default all effects and filters are turned off. Clicking on the name of an effect or filter activates it and displays its settings.
In this case a subtle Bleach bypass effect looks good, with settings of Contrast: 0.45, Saturation: 0.95 and Strength: 60%.
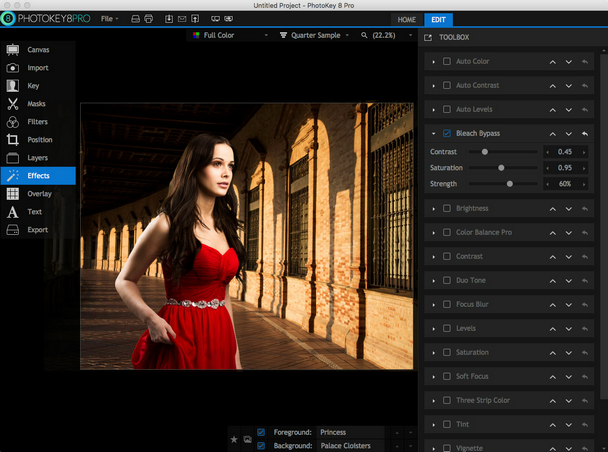
Experiment with different combinations of effects and filters to create different looks.
For information see the Filters and Effects chapters.
Save your project
It is important while working in PhotoKey to save your project regularly. This way you can work on the same project over several sessions, and won't lose any work in the event of a power failure.
PhotoKey 8 Project files do not include the actual image files. If you want to transfer the project to another computer or archive it you will need to also include the associated image files.
You can save your project at any time by clicking the save icon, or from the File menu.
PhotoKey 8 Projects cannot be opened in other software. If you want to create a final image from your project to use in programs like Photoshop, you need to first Export it.
See Saving projects for more information.
Export your images
Once you are finished working on your image you can export it to a new image file. The export icon on the toolbar is a quick way to export the currently displayed image, or you can choose 'Export canvas' from the file menu.
See the Export chapter for full details, including information about batch processing.